Make an HDTV in adobe illustrator


STEP 1 Draw a simple square
make the rectangle whatever size you want and give it a black fill

STEP 2 Duplicate the square
copy and paste the rectangle(ctr+c/ ctrl+v), then now make the copy smaller then the original but still look the same(use shift key, select the bottom edge and push it inwards to make smaller or just make it smaller the way you usually do) and bring the copy to the front with the black fill
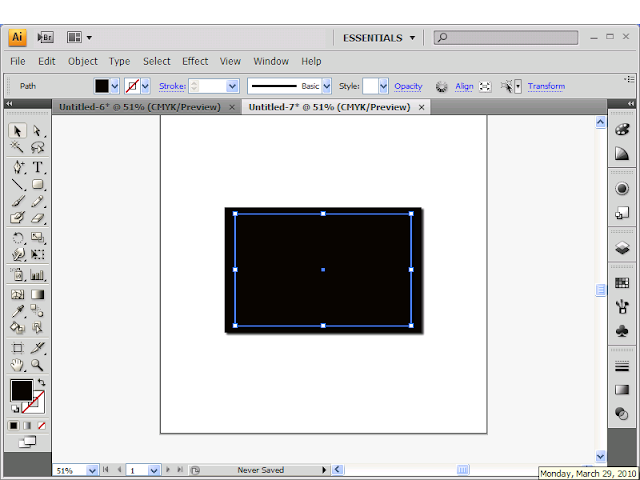
you should now have a big rectangle and a smaller one brought to the front
(like below the smaller rectangle is selected,)


STEP 3 3D affect to the bigger rectangle
 Select the bigger rectangle, then go to appearance on the right panel

Click the appearance , the one that looks like an O(circle), then to the right click on graphics


Then at the bottom of the graphics menu click on the icon that looks like 2 folders, then click on image effects


then on the image effects menu, click on the RED drop shadow hard effect. It should now change the bigger rectangle fill and also add a drop shadow. Go back and change the rectangle fill back to black

STEP 4 Change the fills to gradients

Select the bigger rectangle. Go to the swatches panel and click on the gradient fill the radial one. It should now change the fill of your bigger rectangle to a gradient.


It should now start to look more like a flat screen tv

STEP 5 select the smaller rectangle and change its fill

select the smaller rectangle, go to the swatches panel and click on the linear gradient it should be the first one on the same row as the radial gradient from before.


Like mines your tv should not look so sexy, atleast not yet

STEP 6 Change the smaller rectangles gradient

if you dont know how to change rectangles fills look at my previous blog about gradients before you continue
now select the smaller rectangle, drag out the gradients menu or the swatches menu whichever you prefer.

then your going to need to have three gradients Arrows(you should already have two, a black and white)
after you have 3 gradient arrows, drag and add the color #58595B or (3rd color after the black color on the bottom row(if you have that row)) to the first arrow  and the last arrow, not the middle one. slide down your middle gradient arrow a little closer to the left arrow(see picture below).

The middle arrow should have a black fill, if not change it. Step 6 should look like this below


STEP 7 add this little bottom part for the the tv stand(see picture)

You can make a circle, use the direct selection tool to delete the top part of the circle and make it a half circle, or draw it with a brush tool, or just make a circle and right click,arrange,send to back and place it bellow the tv still it looks like a half a circle


You have to change the fill of the little bottom part to linear fill and replace the white arrow on the gradient menu with the same gray color from before # 58595B (see below picture for example)


Dont use 3 arrows for the gradient just use 2(the original amount of arrows)


STEP 8 add the bottom part for the TV stand

create a rectangle that is smaller then the tv about half the length(see picture below)
copy and paste the smaller rectangle and

make a even smaller rectangle by holding down the shift key and selecting the bottom edge and click and drag the bottom of the rectangle Inwards or just do it the normal way and make it smaller then the original rectangle


give the smaller rectangle the same fill as the smaller rectangle that was part of the tv, to do that just select the smaller rectangle,  use the eyedropper tool ,click on the smaller rectangle for the TV(the one with the 3 gradient arrows) it should automatically change the fill of the small rectangle and it should now have a gradient fill.

just send those the rectangle you just created back( right click, arrange, send to back)


EXTRA(optional) Now just use any shape to make the TV button I used a round rectangle and gave it a white outer fill and a black inner fill

YOUR ALL DONE
 your tv should look like this, if not you did something wrong


Sharp Electronics Corp. - Sharp Aquos Lc-46D65U 46 inch  Lcd Tv - 46 inch  - Active Matrix Tft - Atsc - Ntsc - 176 / 176 - 16:9 - 1920 X 1080 - Hdtv - 1080P

Sharp Electronics Corp. - Sharp Aquos Lc-46D65U 46 inch Lcd Tv - 46 inch - Active Matrix Tft - Atsc - Ntsc - 176 / 176 - 16:9 - 1920 X 1080 - Hdtv - 1080P



TOP 5 sites for designers


www.godaddy.com


Bluehost Web Hosting $6.95


1. 99designs.com


At 99designs you get to submit your designs in contest and get paid $100 or more, some contest are for over $1,000.

Some of the contest include webpages,stationary, logo designs, button&icon designs, t-shirt designs, banner ad designs, print designs, twitter background designs, quickbook form designs, and custom wordpress themes.

The contest that they have can be blind contest meaning no one else can see the design but contest holder(the person paying the money).

After you win your first contest you can submit designs on the logo store. At the store you just submit a logo and there's no contest, if someone see's your design and likes it they can purchase it for $99 or buy it out for $256(meaning no one else will get that logo but them). You will then have 24 hours to edit the logo and put their company name in it and submit.

2. Dafont.com


What is dafont? dafont.com is a site where you can get a variety of fonts free. But some of them are not commercial fonts and are only for personal use(like a project for school, cant sell them) if you do find a font you like the creator of the font can allow you to purchase the font for commercial use.

Some creators allow you to use fonts commercially as long as you donate to them for their time spent creating the font.

3.sxc.hu.com


this by far one of my favorite site, why? you get stock images for free all you have to is sign up. Now if you don't know what stock images is its images that don't require a license. This site has beautiful quality images all for free, that's why I love it so much.

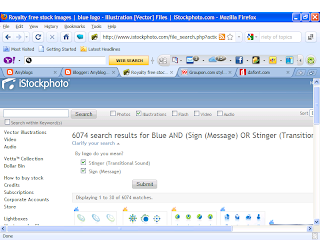
4. Istockphoto.com


You can find everything at Istockphoto such as stock images, logos, flash, videos, audio. But they do require you to purchase a license but they are all worth it since you get high quality and very attractive items.

You can even sell your own items at Istockphoto and people can purchase the downloads. While some people make a few dollars doing that others make their living doing that meaning quitting their regular jobs and just uploading things on Istockphoto.

Before you sign up to sell items they do require you to submit some of your best work for a review of your application and you can either be accepted or rejected.

5. Spreadshirt.com


If your like me you probably design shirts. Well at this site you can sell your shirt designs, setup your own shop, or just sell shirts. You don't pay a fee for the shop. While your not the one doing the actually printing they are and you just get an amount of the commission.

When you sell your own design, others who have their own shop can purchase your designs and sell it on their own shop.

You can also purchase shirts their for a variety of prices,styles,designs, and sizes. Their are shirts for males,females,babies, and kids. All your purchases will be shipped to you.


use gradients in adobe illustrator


Adobe Illustrator Cs4 - Complete Product - Retail - Mac, Intel-Based Mac

Adobe Illustrator Cs4 - Complete Product - Retail - Mac, Intel-Based Mac


Today I will show you how to use gradients

draw any shape you want me I drew a rain drop and place a heart into it(whenever I make my next blog I will show you how to make it)

select the shape and have both the swatches and gradient panel open. If you dont know how to drag on of them out and your screen should look like this


now while selecting the object click on the circle gradient or linear on the swatches panel(the panel with all the colors to choose from) it should give your swatch a gradient fill.

now when you find a color you want on the swatches panel grab it and drag it(dont click or it will change the gradients color) just grab it and hold down the mouse button while dragging(the hand should show up showing that its being dragged) and place it on any arrow on the gradient arrows(gradient slider). Its best to go from lightest to darkest.

now find another color you want on the swatches panel and do they same but just drag it over the other arrow(gradient slider). You should have a 2 color gradient fill. You can adjust the gradient sliders to how much of a color you want to show up. You can even have more then 2 colors just by click on where ever you want around the gradient arrows like this below.


Photoshop CS4 - License

Photoshop CS4 - License


draw a shopping bag adobe illustrator

Lenovo ThinkPad X200s Notebook

Lenovo ThinkPad X200s Notebook


In this blog I will show you my way of drawing a shopping bag and a sales tag in adobe illustrator

STEP 1 draw the square and trapezoid

start of with a square and give it what ever color gradient you want if you dont know how to fill the color as a gradient look at my gradient blog. then create a trapezoid but make the trapezoid color darker then the color of the square. Then place the trapezoid on top of the square and group them. To make the trapezoid you can either draw it manually or just draw a rectangle then use the direct selection tool(the gray arrow next to the black one) and select the left side of the rectangle and drag it to push it out then do the same for the right side. Your trapezoid and square grouped together should look like this.


STEP 2 draw the handles

easy just use the brush tool to draw it like this


STEP 3 to draw the sales tag

first draw a triangle then make it whatever color you want. Now select the triangle then go to effect,stylize,round corners. play with the numbers till you find the one you like, me I used 15pt. Then draw a small white circle and place it on top of the triangle. Then draw a long rectangle and place it below the triangle and group it.

Then select the sales tag(both the triangle and the rectangle)and give it a 3d effect by click on the appearance on the right panel and click on it, then click on the graphics, then click on the folder that looks like 2 folders at the bottom left and select image affects, then click on the red image effect, it may change the color of the sales tag but you can change it back.

Then click on the Type tool and hold it then a sub-menu should come out then click on the type vertical. Type the word sales and place it on the rectangle. then use the brush tool to draw a curvy line and place it on the white circle. Now you have a sales tag so now place the sales tag on the square. You can rotate the sales tag if you want. It should look like this.


Make a cute dog in adobe illustrator

Adobe Illustrator Cs4 - Complete Product - Retail - Mac, Intel-Based Mac


Adobe Illustrator Cs4 - Complete Product - Retail - Mac, Intel-Based Mac


In this Blog I will teach you how to draw a dog in adobe illustrator.

STEP 1
draw a circle using the ellipse tool

I used a 15 point round and a 1pt stroke. The fill I used is 8B5E3C you can use whatever you want. The circle should look something like this

STEP 2 Draw a curved line to represent the mouth

I used a 15 point round and the paintbrush tool for it.
It should come out like this

STEP 3 draw a nose and tongue

draw a nose with the paintbrush tool and give it a black fill then draw a tongue using the paintbrush tool and give it a pink fill(remember 15point round and 1 point stroke) the tongue fill used is EE9CB0 and put a line through the tongue your dog should look like this now


STEP 4 Draw the ears and eye's

for the eyes start out with a circle and place a smaller circle in it and fill the smaller circle black. Then add a smaller circle on the right edge of the black circle and give it a white fill. Now copy and pace those eyes you just made and make another one and put them together close by to make 2 eyes .If its confusing(like it was for me) here's a photo to show you how it should look like.


STEP 5 draw the ears using the paintbrush tool.

before drawing the ears copy and paste the tongue WITHOUT THE LINE IN THE MIDDLE OF IT place the copy where you will put the ears to the right on top of the head near the right eyes and you will use the paintbrush to draw the ears and give it a brown fill just like the head of the dog and place it above the copied tongue. copy the brown filled ear and paste and put the copy in the opposite direction near the left eye ball. Here's how it should look like.


STEP 6 draw the body and a few black dots in both the right and left of the nose

to draw the body use a 15 point round using the paintbrush tool and draw it below the head and send it to the back so the head could be in front of it then to draw those little dots just draw a little circle with the ellipse tool and give it a black fill and then just copy and paste it twice and now you should have 3 dots now just group them copy and paste them and group the copies now position 1 group on the left and another on the right. it should look like this


STEP 7
draw the feet of the dog

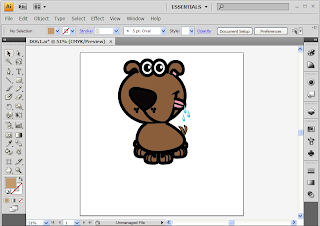
use the brush to draw it and give it a brown fill same color as the head then copy and paste the feet and make the copy point to the other direction to do that just go to Object>transform>reflect now place the feet below the body now add 2 line curves on each foot to represent the toes then group each foot and the lines and copy and paste the the feet to make another feet and place them by the first feet. then use the ellipse tool to draw a circle and make the circle have a brown fill, the circle should represent the hand of the dog. Copy and paste the circle and now you should have 2 circles so place 1 on each side of the dogs body by the right and left foot of the dog. Here's how it should look like


STEP 8 now to add a tail and the drool

use the brush to draw the tail and give it a brown fill and place it at the right end of the body and send it to the back by right click and arrange and then send to back. Now to draw the drool you can do this however you want for myself I used the brush tool to draw it and gave it a gradient fill of light blue to dark blue. You can make the drool however you want. So your dog should look the this


Adobe Creative Suite V.4.0 Master Collection - Complete Product - 1 User - Retail - Pc


create Visually Rich, Engaging Content For Virtually Any Media - Print, Web, Interactive, Video, Audio, And Mobile - Using The Tightly Integrated Tools And Services In Adobe Creative Suite 4 Master Collection Software.


*Brand Name: Adobe [80329K] UPC: 0883919165707 UNSPC: 43232102 7.8L x 5.7W x 2H 0.95 LB 0.05 Cubes